Thursday, January 19, 2012

Same Photos + Different Styles and Techniques = Countless Layouts

Seperti FILM yang punya banyak genre : drama, action, horror, komedi, atau MUSIK yang bisa digolongkan menjadi pop, rock, jaz, dangdut, Digital Scrapbooking juga ada style-nya, lho! Di sini akan dibahas beberapa style layout yang bisa jadi panduan kamu untuk menemukan style kamu dalam berkarya. Here we go....

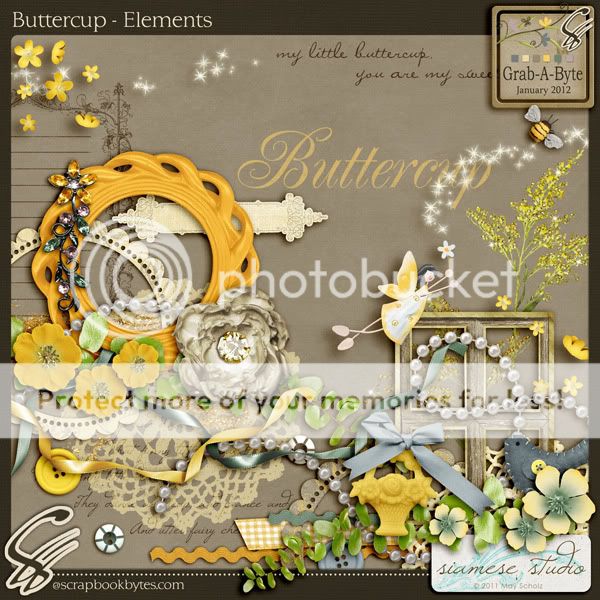
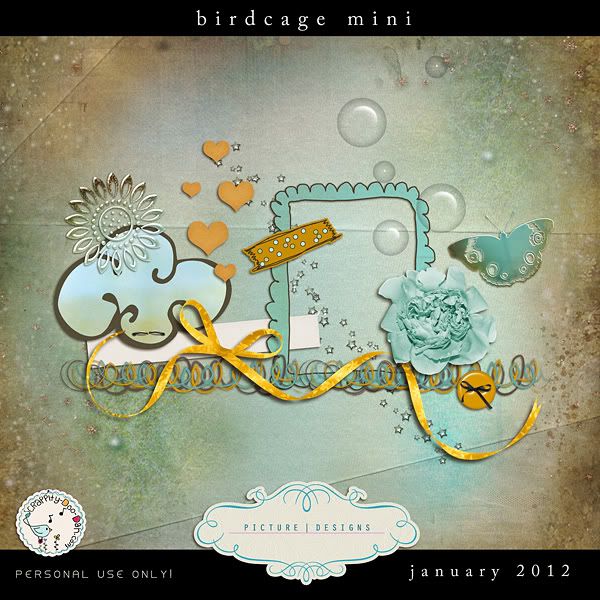
Dari 6 foto di samping ini, aku akan mencoba memperkenalkan jenis style digital scrapbooking dan teknik-tekniknya. Aku hanya ingin menunjukkan bahwa dengan jenis style yang berbeda + kombinasi teknik + imajinasi = beragam jenis layout!

Menurut Debbie Hodge, layout yang baik selalu mengandung 5 struktur dasar berikut ini : photo, title, journaling, embelishment & canvas (paper). Tapi, kita juga harus menerapkan elemen desain seperti : Emphasis (Dominance), Repetition, Alignment, Contrast, Balance, Flow agar layout kita tidak "menganiaya mata"... hahaha... Contohnya seperti di samping ini.

Semua struktur memang sudah terpenuhi, tapi elemen desain tidak diperhatikan. Emphasis/fokus-nya nggak jelas, semua foto berkompetisi menarik perhatian sehingga membingungkan. Repetion (pengulangan) elemen burung kuning kurang variatif sehingga membosankan. Alignment (margin) nggak jelas, rata kanan atau kiri atau tengah. Contrast, bingung kebanyakan warna. Balance, sama sekali nggak seimbang antara bagian kanan dengan kiri layout. Flow, nggak ada panduan sama sekali dari mana harusnya pandangan mata dimulai dan berakhir aliasnya movement-nya ngaco! TERRIBLE....

OK, jadi perlu diingat bahwa digital scrapbooking bukan sekedar main tempel foto dan elemen lainnya, tapi juga harus mematuhi prinsip-prinsip desain yang 6 tadi : ERACBF. Nah, seterusnya ada beberapa style layout yang bisa kamu pakai eksperimen sebelum mendapatkan style kamu sendiri.

Di bawah ini, dengan kit yang sama yaitu Land of Learning dari Marie H Design, bisa dibuat 3 jenis layout yang sangat berbeda. Lihat deh, hanya dengan satu kit kamu bisa menciptakan beragam jenis tipe layout. So, start maximising the use of your kit by experimenting with it now!
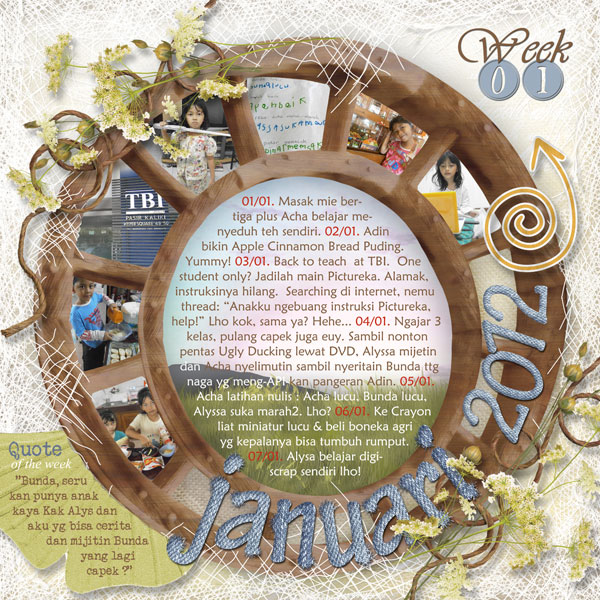
1. CLASSIC
Balance and structure are key points of classic style layouts. - by Jennifer Marione

Ciri khas style classic adalah letak foto-foto yang tegak, jarang sekali yang miring-miring. Elemen penghiasnya pun cenderung minimalis. Jurnaling menjadi struktur yang penting dalam style jenis classic ini. Layout jenis ini cocok sekali buat digi-scrapper yang senang desain yang simetrikal dan seimbang (balance).

Teknik yang aku pakai dalam pembuatan layout klasik ini pun sederhana. Pertama, aku tumpuk kertas biru yang sudah di-resize di atas kertas kuning dan ditambahkan ric-rac putih sebagai pemanis. Kedua, semua foto di-crop dengan bentuk segiempat yang sama besar lalu diberi bingkai putih melalui menu Image > Stroke. Ketiga, aku buat judul dengan kombinasi 2 font. Keempat, jurnaling diketik dengan alignment rata tengah dan tidak lupa penambahan tanggal. Kelima, penambahan pita, kancing dan bintang untuk menghias layout. Terakhir, tidak lupa ditambahkan shadow untuk memberikan sedikit kesan timbul walaupun tipis sekali.

2. CLEAN
White space and sparse embellishments are the hallmarks of the clean layout style. - by Tricia Groenhoff

Ciri khas style clean adalah layout yang terkesan simple tanpa banyak elemen penghias. Banyak ruang kosong tercipta, sesuai dengan slogan "Less is More". Kalau kamu tipe orang yang suka dengan gaun sederhana yang simple tanpa pernak-pernik, maka layout ini cocok banget untuk kamu! Layout jenis clean ini bagus sekali untuk scrapping foto-foto yang cantik dan berkualitas baik sehingga sayang kalau harus berkompetisi dengan elemen penghiasnya. Kertas dengan warna cerah maupun bercorak juga bisa digunakan dalam layout jenis ini dengan jumlah terbatas tentu saja.

Teknik yang aku pakai dalam layout clean ini termasuk sederhana. Pertama, aku tumpuk kertas hijau dan bercorak garis yang sudah diperkecil di atas kertas polkadot biru. Kedua, aku lubangi kertas hijaunya agar tembus mengekspos foto dan kertas bercorak di bawahnya. Ketiga, foto-fotonya aku ubah menjadi hitam putih dan diatur menggunakan fungsi Image > Adjustment > Hue Saturation ke arah warna biru supaya serasi dengan warna background. Keempat, jurnaling diketik dan dirotasi ke kiri. Kelima, judul dan tanggal ditambahkan sesuai prinsip allighment rata tengah. Terakhir, simple shadowing  diterapkan hanya pada kertas hijau untuk kesan timbul.

3. HODGEPODGE
Mixed patterns and layering are cornerstones of hodgepodge style layouts. - by Kate Earley

Kalau kamu suka layout yang “eclectic,” style hodgepodge ini udah pasti bakal jadi favorit kamu. Ciri khas style hodgepodge adalah kombinasi foto, kertas dan embellishment yang saling bertumpuk membentuk layout yang penuh tekstur dan meriah. Digi scrapper jenis ini suka mencampur berbagai bentuk, corak dan jenis kertas plus embellishment dan merangkainya di seputar foto yang telah diatur dalam berbagai kemiringan.

Aku menggunakan cukup banyak teknik untuk me-retouch foto-foto yaitu : teknik Out of Bound ( = objek sepeti keluar dari bingkainya) dan Blur  background ( = latar belakang foto diburamkan) untuk foto kiri bawah dan teknik Selective colouring  (= latar belakang foto dibuat hitam putih tapi image fokusnya tetap berwarna) untuk foto tengah atas. Sedangkan untuk 2 foto lainnya aku hanya bermain dengan Image > Adjustment > Levels dan Brightnest/Contrast untuk memperbaiki kualitas foto yang agak gelap menjadi lebih terang. Teknik re-touch foto sangat penting untuk dipelajari karena foto adalah element paling penting dari sebuah layout, jadi kalau kualitasnya bagus pasti akan menunjang kesempurnaan layout secara keseluruhan. Teknik lain untuk menggelapkan / menerangkan hanya sebagian dari foto adalah menggunakan tool Dodge and Burn.

Selanjutnya, aku menumpuk 3 kertas dengan ukuran dan posisi yang berbeda. Masalahnya kertas background yang aku pakai warna asalhnya kurang gelap, jadi aku atur sedikit meggunakan Image > Adjustment > Levels dan Hue Saturation ke arah biru gelap.Tutorial cara mengubah warna embellishment ada di sini.

Berikutnya, aku mengatur pigura dan fotonya dengan posisi bertumpuk dan miring-miring untuk kesan "messy". Journaling diketik di atas kertas bergaris yang tidak lupa diberi shadow untuk kesan melayang. Embellisment pensil, pita dan bintang-bintang diletakkan terakhir untuk menghias layout. Selesai... eh, jangan lupa shadow-nya ya. Tidak semua elemen mempunyai komposisi shadow yang sama, lho. Untuk tutorial lebih dalam tentang shadow, bisa lihat di sini dan di sini.

4. SHABBY CHIC / VINTAGE
Soft colors and a worn feel are typical in shabby chic style layouts. - by Jennifer Marione

Jika kamu gemar barang antik dan suka membuat clustering dengan bunga-bunga yang feminin maka layout jenis shabby chic ini cocok sekali untuk kamu. Keseluruhan layout shabby chic akan menampilkan kesan vintage yang anggun.

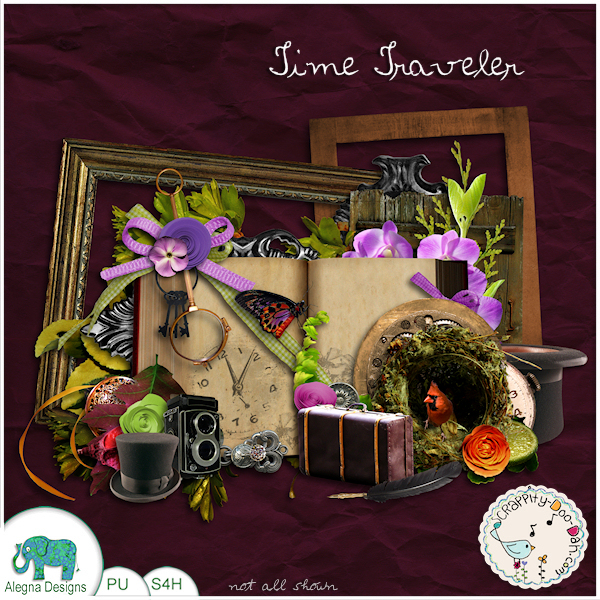
Kali ini aku menggunakan kit yang berbeda, Time Traveler dari Alegna Design karena kit yang pertama tidak cocok dengan kesan shabby chic yang ingin ditampilkan. Kit shabby chick didominasi oleh koleksi kertas yang usang, sebagian besar bernada pastel dan embellishment yang feminin.

Untuk menampilkan kesan vintage, foto-foto aku ubah menjadi sepia. Lalu aku merangkai aneka embellishment membentuk clustering di sekitar pigura foto. Tips untuk teknik clustering yang baik bisa dilihat di sini. Jurnaling aku letakkan di sisi kanan untuk menyeimbangkan layout secara keseluruha. Teknik menciptakan jurnaling dan title yang cantik bisa dilihat di sini, di sini dan di sini.

Nah, untuk menciptakan latar belakang yang unik, bisa digunakan teknik Blending seperti di atas. Dalam layout ini fungsi blending image adalah untuk mengisi kekosongan bagian kiri atas. Tutorial blending bisa dibaca di sini.

5. FANTASY
Using artistic imagery to tell the story is commonplace in fantasy style layouts. - by Joann Kinnard

Ciri khas style fantasi adalah background layout seperti di dunia imajinasi. Teknik ekstraksi kerap digunakan untuk memisahkan objek dari latar belakangnya dan menaruhnya di halaman fantasi yang sebelumnya telah diciptakan. Layout jenis ini cocok sekali buat kamu yang sangat kreatif dan suka bereksperimen dengan tema-tema fantasi. Berbeda dengan style lain yang biasanya disertai jurnaling sebagai pengikat memori, maka layout jenis fantasi ini lebih kuat kesan art-nya karena berfokus pada keartistikan image yang ingin ditonjolkan.

Kit fantasi pun berbeda dari kit style lainnya karena kebanyakan embellishmentnya adalah benda real sesuai tema layout yang hendak dibuat. Kit untuk kreasi kali ini adalah Goat dari Galerie de Jackie. Teknik ekstraksi yang dipakai di sini bisa dilihat di sini dan teknik shadow 3 dimensinya bisa dilihat di sini.

Nah, style mana yang paling kamu suka? Pilih dan ceritakan alasan kamu lewat komentar di bawah posting artikel ini ya. Awas kalo nggak... hehehe. Happy experimenting!

Note : Yang mau lebih serius belajar digi-scrap, bisa lihat ke Get It Scrapped.
1. Lesson #1: Learn Scrapbooking Design Principles
2. Lesson #2: Emphasis
3. Lesson #3: Repetitions
4. Lesson #4: Alignment
5. Lesson #5: Contrast 
6. Lesson #6: Balance
7. Lesson #7: Visual Flow
8. Lesson #8: Page Part

PictureDesigns : You and Me

Sandra from PictureDesigns created this beautiful kit called You and Me as a celebration of love. So, it works great for all pages and cards about love, anniversary's, valentine`s day and also just for every other kind of lovely memories. Included are 12 great papers, 60 unique elements (92 in total) and 5 WAs.

If you're looking for lots of heart form to scrap your layout, this kit is totally yours! And the colorful flowers available here will make a diverse cluster suited to decorate your frame.

I, myself, decided to re-do my black and white wedding photo into totally new layout. Wow, I love the total look... so colorful, so different with the original version :)

Sunday, January 15, 2012

How to Join Challenges

Ikut digi-scrap challenge yang diselenggarakan forum seperti Ginger Scraps, Scrappity Doo-Dah, Scrapbook-Bytes itu seru lho! Selain untuk menerapkan teknik yang sudah kita dapat, menambah kenalan sesama digi-scrapper seluruh duni, sampai berkesempatan mendapatkan kupon kit gratis! Asyik kan... Jangan khawatir kalau kamu ngerasa masih pemula dan belum pe-de dengan layout kamu. Justru dengan ikutan challenge, wawasan kamu bakal bertambah dan otomatis teknik kamu juga ikutan meningkat. Gimana, tertarik nggak? Mau ikutan challenge tapi nggak tahu caranya gimana? Ini ada panduannya.

Contoh challenge yang aku berikan panduannya ini di forum Ginger Scraps. Kamu harus register dulu untuk bisa ikutan. Registernya gampang kok, tinggal ikuti link Register ini. Setelah kamu mengisi data diri dan mendapat email konfirmasi maka kamu bisa langsung log in ke forum dan cari bagian challenge lalu pilih jenis challenge yang mau kamu ikuti. Sedikit saran, klik dulu Cookie Jar untuk mengetahui aturan main di forum ini. Baca thread New Reward biar lebih jelas.


Kita kita buka thread challenge yang akan kita ikuti dan ikuti semua instruksinya. Di sini contohnya, aku mau ikut Ginger Scraps Inspiration Challenge Januari 2012 :

Setelah kita selesai mengerjakan layout untuk challenge, maka kita harus meng-uploadnya di gallery yang sesuai dengan Challenge yang kita kita ikuti. Klik gallery di Ginger Scrap header. Bila kamu sudah log ini di forum, maka secara otomatis username kamu akan muncul di sisi kanan atas. Lalu klik Upload Photo.


Untuk gallery Ginger Scraps, perhatikan layout kamu maksimum berukuran 600x600 pixel dan ukurannya di bawah 250kb. Setiap gallery punya batas ukuran file yang berbeda-beda, jadi cek dulu aturannya sebelum meng-upload.


  • Pilih kategori challenge yang akan kamu ikuti. Contoh : Inspiration Challenge.
  • Pilih foto yang akan diupload dari komputer kamu dengan meng-klik Choose File.
  • Ketik judul layout kamu. Contoh : New Year Resolutions
  • Ketik deskripsi layout kamu seperti nama kit, font yang digunakan. Bila kamu ingin menampilkan link kit yang kamu gunakan, formatnya seperti ini : Kit : [url=linkKit] Nama Kit[/url] by Nama Desainer. Contoh : Kit : [url=http://store.gingerscraps.net/Capturing-Memories.html]Capturing Memories[/url] by Marie H Designs. Pastikan gallery tempat kamu meng-upload layout membolehkan kamu untuk menampilkan link tersebut, sebab ada gallery tertutup yang hanya membolehkan anggotanya me-link produk tokonya saja.
  • Ketik kata kunci untuk menggambarkan layout kamu. Contoh : resolution, memory.
  • Tekan Upload/Submit.

Halaman selanjutnya akan menampilkan layout yang telah kamu upload beserta data lainnya. Pastikan semua informasi yang kamu masukkan benar. Tekan Submit. Voila, layout kamu berada di gallery!

Klik image layout kamu di gallery, dan kamu akan masuk ke halaman di bawah ini. Klik kanan mouse kamu dan pilih Copy image URL. Link image inilah yang akan kamu posting di thread challenge yang pertama kali kamu buka.


Sekarang, kembalilah ke halaman challenge dan klik Reply to Thread.

Klik icon pohon dan tekan Ctrl V untuk paste link image kamu. Klik OK.

Lalu sertakan juga link halaman layout kamu di gallery, bukan link image ya! Caranya klik gambar bola dunia biru terus paste link halaman yang sudah kamu copy sebelumnya. Lihat bedanyanya : link image vs link halaman. Jangan keliru ya! Lalu klik Submit Reply.


Langkah terakhir adalah meng-copy link challenge kamu ke thread Challenge Tracker Thread supaya poin challenge kamu bisa tercatat. Caranya : klik kanan nomor posting kamu di kanan atas (contoh : #10) lalu klik kanan dan pilih Copy link address.


Buka thread Challenge Tracker Thread, cari post kamu dan edit. Paste link yang sudah kamu copy tadi di challenge yang bersangkutan. Di sini aku sudah mengerjakan Desktop challenge, Inspiration challenge dan Templates, jadi linknya semua aku sertakan, Kalau sudah selesai semua baru kita tulis TOTAL jumlah challenge yang kita ikuti untuk mendapatkan poin.


Selesai. Kayaknya langkahnya panjang ya... tapi kalau udah biasa mudah kok. Selamat ikutan challenge!

Project 365 : Week 2 - January 2012 & Free Coupon Shopping Time!

I just remembered that I haven't use Marie's CT Coupons she gave as Christmas presents. Oh boy, I've 7 of them! Am I lucky or what... Currently, I'm looking for some kits that can help me design my Project 365. And I've spent them to buy these 2 gorgeous kits from Ginger Scraps.

I'm changing my design to be more symmetrical this week. I used my just-bought-kit from LauraMarie Scraps called Life Happens - 365. I loved the combination color of orange, blue and green in this kit, so I decided to play a little and created this layout.


The second kit is called School's In By Twin Mom Scraps. The minute I saw it, I knew I have found the right kit to scrap my favorite long time pictures of Alyssa learning to read.  

I also used this layout to join January 1-15 Template Challenge at Ginger Scraps. I'm so eager to do at least 13 challenges this month to earn the price of $5 coupon. So far, I've finished 8 challenges. Hopefully I can finish another 5 on the remaining half month. Cross my fingers and hope to win!


Friday, January 13, 2012

You are a Gem - March & Capturing Memories by Marie H Designs

Our lovely designer, Marie H, has just released not 1 but 2 kits at once! And, wait for the good news (drum rolled please....) they are both at 40 % off. Wow, she is super productive... love being your CT :). Keep busy every week...

First of all she created a new kit called "Capturing Memories". This kit is all about photos and keeping recored of them. You can grab it at Ginger Scraps -*- DSDI -*- MyMemories.

I used this kit to join several challenges at Ginger Scraps, Scrappity-Doo-Dah and Scrapbook-Bytes. I know I should've just focused on 1 forum, but I can help it... I just love to do challenges and earn the reward of course! Here are 2 LO from this kit :


The second kit is the third part of her Birthstone series, called "You are a Gem - March". I love the blue color so much! You will find it at Ginger Scraps and Digiscrap Drive in (It will arrive soon at MM).

I dedicated my layout here for my best friend, whose birthday is on March. I took photos from her large collection on her Facebook page picturing her in a fishing trip. She is currently pursuing her passion for psychology study in Wisconsin. Miss you, Witri!


She also doing a Retiring Sale. It's time to make room for more new products! She has over 10 products at $ 1.50 each that will be gone for good in a month. You can grab them at GS ** DSDI ** MyMemories.


Wilma4Ever : GJ-Kit Happy Camper by Galerie de Jackie

December last year, there was a Parent Gathering event held by Acha's kindergarten - TK Avicenna- as the end of the first semester special event. It was conducted at Kampung Bamboo, an outbound field at Padasuka near Saung Angklung Udjo. There, I took lots of pictures of Acha and Alyssa (she came along too, of course). This kit, GJ - Kit Happy Camper is just perfect to keep those memories alive.

It contains 3 poser ©cute n toonz, 110 beautifuls element, and 8 papers. So many elements you can find here, make this kit perfect to scrap your outdoor activities such as camping trip, beach holiday or picnic! Currently, it is on 60% sale from $5.00 to only $2.00. You can grab this kit at Wilma4ever.

Look what I made with this kit :


Thursday, January 12, 2012

Siamese Studio : Buttercup - January G-A-B for Scrapbook-Bytes

These are the newest kits from May - Siamese Studio. The moment I saw it, I knew have to re-do my Bee Princess page featuring Arumi (my niece) with it. I practiced my shadowing technique in here, varying different arrangement on Distance, Spread and Size. I'm quite pleased with the end result...

These 3 mini kits are currently released at Scrapbook-Bytes and will be on sale for $1.00 each for one week during the G-A-B week (01/09/2012 - 01/16/2012). G-A-B, or Grab-A-Byte, is a monthly collaboration of Scrapbook-Bytes' designers using one color swatch. The result is a gorgeous mix and match option for the customers. The separate portions are never priced over $2.00 for the
first week only! After the first week they are repackaged and sold as a kit, sets, etc. and back to regular price! This month, Siamese Studio participates in G-A-B by creating 3 lovely kits : Buttercup Clusters,  Buttercup Elements and Buttercup Papers.

Take a break from your cares and escape to the fairy garden with me. Bask in the peace all around you as you surround your cherished photos with just the right amount of serenity and enchantment. The delicate yellows and soft blues are perfect for enhancing your most precious moments while the little touches of sparkle bring elegant whimsy and magic to your everyday moments. Floral embellishments and a hint of feminine charm make this kit perfect for scrapping fantasy pages, all the biggest events in a little girl's life, and all the moments in between.

Included in Buttercup Cluster are:
- 4 pre-shadowed clustered frames.

Included in Buttercup Elements are:
- more than 40 elements including one bee, one bow in three colors (yellow,ivory, grey), two different buttons (both comes in two colors each, four in total), one ivory doily, one doily stamp, one fairy, one felt bird, one yellow flower spill, one yellow buttercup fabric flower, one ivory fabric flower, two silk flowers with diamond stem (brown, yellow), one foliage, one round plastic frame in two colors (ivory, yellow), one round paper frame in two colors, (brown, ivory), one glitter paint, one jewel flower on stem, one journal, one pearlstring, one resin bit in two colors (yellow, green), one curly ribbon in three colors ( yellow, brown, green), one straight ribbon in two colors (yellow, green), one ricrac in three colors (yellow, green, ivory), one tage, one sparkles, one window frame, three wordarts.

Included in Buttercup Papers are:
- 10 solid and patterned papers; 12 x 12

You can get them at Scrapbook-Bytes now. So grab them while they're still on sale!

I also use my layout with these kits to join January 2012 G-A-B Challenge. I feel the leafy background is a little overwhelming for my taste, but I tried my best to make it work. So, this is the final look! Here you go....

CT Coupons Shopping Time!

I just remembered that I haven't use Marie's CT Coupons she gave as Christmas presents. Oh boy, I've 7 of them! Am I lucky or what... Currently, I'm looking for some kits that can help me design my Project 365. And I've spent them to buy these gorgeous kits from Ginger Scraps:


Monday, January 9, 2012

Photoshop Tutorial : Page Curl

My friend, Chika, asked me if I knew a good tutorial for making a page curl. I've never done it before... So, I searched and found this short but useful tutorial :

Sunday, January 8, 2012

Project 365 : Week 1 - January 2012

I've decided to begin Project 365 this year. Every day, I am going to take photos of my day and scrap it every week. Why Project 365?  I want to commit for something bigger this year. The idea of having to scrap 365 days of our life seems to be overwhelming for me at first, but I've set my heart to do it. I want to really start keeping my family's memories, not just make layout whenever I have the mood for it.

Also, since my husband spent his time working mostly in different city making him misses the children so much all the time, I hope this project could be his means to peek to their daily life. Every Monday, I intend to upload a new page on Facebook, so he would have something exciting to look for every week :).

I know, I suppose to keep the page simple. But, when I saw this gorgeous collab kit by Marie H Design called Faith in Every Foot Steps, I can't resist to begin this project with one of the paper.This kit contains 24 papers (7 plain papers, 17 textured papers), 1 overlay, 1 quickpage, 90 elements, 10 wordbits, 2 poems, 1 big map and 2 trail markers. All the papers are 3600 x 3600 @ 300 dpp saved in jpeg and the elements are @ 300 dpp saved in png. It includes : flowers, frames, ribbons, strings, woods, grass, mountains, trek gear, spoons, barrels, buckets, quilt, hand cart, ox, fabric scrap, fences, wood table, flour, wagon, lamp, camp fire, horse shoes, lace, stitch frame, wheel, wire, etc.

English Translation :
01/01. The kids cooked instant noddle together, plus Acha learned how to make tea herself.
02/01. Adin baked Apple Cinnamon Bread Pudding. Yummy!
03/01. Back to teach at TBI! One student only? Apparently they were still on holoday. So, we just played Pictureka cards. OMG, I lost the instruction? While searching in the internet, I found this threa :" Help! My kid threw away the instruction for Pictureka!" Hahaha... same here...
04/01. Taught 3 classes today, pretty exhausted.... Spent teh night watching for Alyssa's Ugly Duckling assembly on DVD. Alyssa massaged e and Acha tucked me in to bed with blanket. Acha also told me bed time stories about a dragon that brned Princess Alyssa and Prince Adin. You two are so sweet, girls :)
05/01. Acha practised writing, First, she wrote : Acha is funny. Then, Bunda (mommy)  is funny. Then, Ayah (daddy) is kind. Then, Adin likes cooking. Last, Alyssa is always angry... Hahaha...
06/01. We went to Crayon to buy beads for making bracelet and necklace. Saw some gorgeous miniature of vegetable and fruit stalls made from clay. Bought Agri-Doll which can grow grass hair on their head if we water them everyday.
07/01. Alyssa learned digi-scrap with Photoshop CS5. Her first project was about her outbound adventure 2 weeks ago. You rock, girl! She even wanted to learned extraction this time. Next, she wants to learn how to change eyes' color.

Saturday, January 7, 2012

Tell Your Story Every Day

May - Siamese Studio has posted a link to Tell Your Story Every Day in her forum, and the content really inspired me. Let me quote some of the content written by Nicole Seitler here :

You see, I’ve been around long enough to notice that there is an epidemic the digital scrapbooking world…

While all digital scrapbookers passionately love this great hobby of ours, only a small number of people are actually scrapbooking.

And even fewer are printing out their pages and making them into books.

Digital scrapbooking was a dream come true for many people who discovered that they were frustrated with their ability to record their special memories using paper, scissors and glue. Paper scrapbooking can be a difficult art to master! You’re dealing with real world product that you can ruin and destroy.

In digital scrapbooking, we all know that there’s nothing quite as wonderful as using CTRL + Z to undo something!

In paper scrapbooking, you could spend three hours moving around two photos and a journaling card… and still not like the way things look.

Digital scrapbooking gives you the tools to easily alter photos and elements.

Don’t like the color of something? You can change it. Don’t like the size? You can change it. Want to use something more than once? There is freedom in digital scrapbooking!

But here is our downfall :

It is too easy to focus on the beauty in digital scrapbooking and forget what scrapbooking is all about!

Over the years, I have seen countless layouts created that are full of intricate layers and clusters with gorgeous photographs… but no journaling in sight. Heck, I’ve even done this myself.

Theses pages have no story to tell. They are just a couple of decorated photographs.

And more recently, I have heard a number of people say that they have made dozens and dozens of pages but they have never printed them. This saddens me even more!

No one can touch them. No one can read them. I wonder, are these people just praying that their backups never fail them?! Sigh.

The key thing we have forgotten is that the goal of scrapbooking is to be recording our most precious memories, telling our stories, writing it all down while these things are still fresh in our minds!

Pictures are beautiful things. Scrapbookers love the art of photography. But, I’m sorry, most photos are not worth 1,000 words—photographs cannot speak for themselves. If you were given a photograph of your great-grandmother as a child, what would you know about it by just looking at it? Where was it taken? Why was it taken? Is there a story behind this or that little detail? Wouldn’t you want someone there to tell you all about it?

As a memory keeper, this is where YOU come in. That is your role!

Owww... this is like a slap to my face! Lately I've been so carried away with my CT jobs and focused only to the lovely kits with gorgeous elements that I kind of neglecting the journaling. Yet the jurnaling it the most vital part of a page, after the photos of course. Hmmm, if this happens to you too, I guess this New Year is a perfect time to change. You can join Nicole to start telling your story everyday here.

You are a Gem - Februari by Marie H Designs

Marie has just release her second part of her Birthstone series. Here is You are a Gem - February.
You can get it at GS and DSDI.

Amethyst is the birthstone of February and it's purple. The ancient Greeks and Romans believed that Amethyst could ward off the intoxicating power of Bacchus and also to keep the wearer clear-headed and quick-witted.

I don't think I've ever worked with purple kit before :). I searched trough my photo collection and Alyssa's toddler pictures are the closest I could get. Too bad none of my family were born on February, so I just used Alyssa photos instead. But it turned out quite nicely. Happy with the final result... I especially loved the white feathers against the purple canvas. Cute...


She also released a new template pack that is all about blocking. This template pack will help you create many layouts that with lots of photos and papers.You can grab it at GS and DSDI. I'm not a big fan of templates because I kinda feel boxed by it. I'd rather start from a scratch and follow where my design instinct tell me to go... lol. Therefore I didn't do any layout with this Template pack :).

Friday, January 6, 2012

Siamese Studio : Tropical Sunshine Bundle

Last month I sent CT Call email to May, the owner of Siamese Studio. I didn't hear from her until the beginning of this month and out of the blue, when I least expected, she sent me a reply :

Hello and Happy New Year Nadia,


I am sorry to get back to you so late. I was a little busy during December.
I would love to have you on my team. I love your designs. Your layouts has so many details and it is fun to look at. If you are still interested to be on my team, please register yourself in my forum which you can find the link on my blog. (link below). Please email your username to me, so I can give you access to the private forum.


I''m looking forward to working with you soon.
Have a great day, and Happy New Year once again.


Hugs,
May aka Siamese Studio

Ups, what a surprise. So, after receiving my first coupon for her store at Zig Zag Studio, I browsed her products and decided on this kit to work. This kit is called Tropical Sunshine Bundle. This bundle is a full collection of Tropical Sunshine. You'll find all 4 packs, which include: Tropical Sunshine Kit, Tropical Sunshine Borders, Tropical Sunshine Clusters, Tropical Sunshine Wordart. You can get it here or here.

The smell of salt in the air, the warm breeze caressing your skin, the rhythm of the ocean in the background..... Take a deep breath, let go of your cares and give yourself a mini vacation with this versatile kit. With a combination of vivid and neutral colors accented with detailed embellishments, you can scrap all your summer photos and beyond. It's time to soak up some Tropical Sunshine from LDrag Designs and Siamese Studio!
Included are :

  • 20 patterned and plain papers; 12 x 12
  • 50 elements including flowers, foliage, splashes, strings and more.
  • 2 sets of alpha, one with both upper and lower case letter a-z, 0-9, and some punctuations.
  • 9 borders (one pre-shadowed version)
  • 8 clusters (four pre-shadowed version)
  • 11 wordart (one pre-shadowed version)
Since the requirement said that I have to post my layouts to Zig Zag Studio and Scrapbook-Bytes, I checked out their challenges to see if I could combine my CT layout with one of the challenge. And, yay... I found the Quote Challenge and made this layout to join. I especially love the cluster tag in which I write my title on. Lat but not least, I added  the border under the canvas which I think made a nice touch to total layout :)


Thursday, January 5, 2012

January 2012 Challenges at Scrappity Doo Dah & Ginger Scraps

I'm so eager to join SDD challenges to get 500 point for $5 free coupon....lol. Last month I only managed to get 350. Hopefully this month I can finish several challenges :). I made this layout with mini kit from Bird Cage challenge hosted by Sandra (PictureDesigns). This is the first time I write my journalling on a paper strips. It was fun...

I really love Acha's photo swimming in the pool. I just turned them to Sepia because the colour scheme doesn't match the mini kit colour.


There are some changes in Ginger Scraps' rewards and challenges system starting January posted by Marie hereNew Reward systems : 
1-4 challenges done 10 %off
5-7 challenges done 25 %off
8-11 challenges done 40% off
12 challenges done 50% off
When you do 13 challenges or more you get a 5 $ Gift Certificate. Each month we start new.
All challenges layouts must have at least 50% of GS products - Daily Download and Welcome wagon counts. You must create 1 layout per challenge. No double-dipping

Each % coupons or Gift certificate will be tallied on an accounting treads by you and will be sent out by the 10th of the following month. The discount coupon and Gift certificate will be for personal use and S4H products only. NO CU products.

And this is my layout for previous month Daily Download challenge. I only downloaded 10 days last month so this is the best layout I can come up with :).


For the Signature challenge, this is my creation :